Fix a broken command
Commands for devices are often missing when the wrong model number has been entered during account creation. We recommend first double checking that your device's model number is correct.
Using the desktop software
- Sign in using the MyHarmony desktop software.
- Select your remote from the gallery.
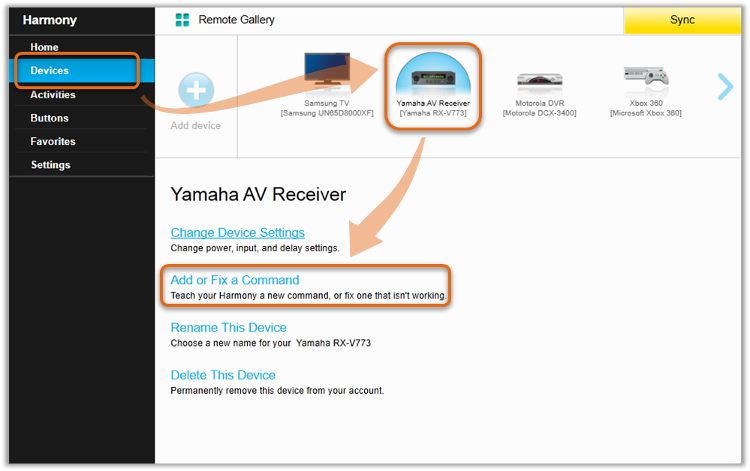
- Select the Devices tab on the left side of the screen.
- Select the device you would like to update.
- Select Add or Fix a Command.
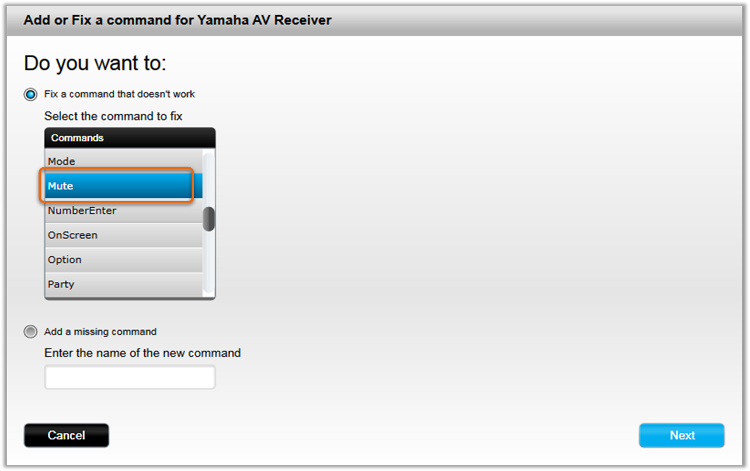
- Select Fix a command that doesn`t work.
- Select the command you want to fix and click Next.
- Using the USB cable that came with your Harmony remote, connect it to your computer.
- Harmony 200/300/350/600/650/700 remotes connect from the top of the remote.
- Harmony Touch, Ultimate and Home remotes connect from the bottom of the remote. Do not use the charging cradle.
- Harmony Smart Control and Harmony Hubs connect using the hub itself, located on the back.
- View additional support information if your remote or hub is not being detected.
Harmony 600/650/700
Harmony 200/300/350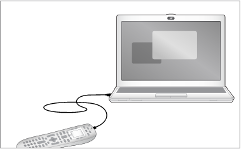
Harmony 200/300/350

Harmony Touch, Ultimate, Home
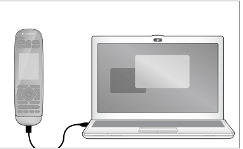

Harmony Hub


- Point the tip of your devices original remote control at the IR input sensor on your Harmony remote or hub as instructed by the screen animation. The remotes should be approximately 3 inches (8 cm) apart.
- The Harmony 200/300/350/600/650/700 IR input sensor is located at the top of the Harmony remote.
- The Harmony Touch & Harmony Ultimate IR input sensor is on the back.
- The Harmony Hub IR input sensor is on the front/ top.
- Press the button that you want to teach on your original remote control. Hold the button for 1 to 2 seconds.
Harmony 600/650/700
Harmony 300/350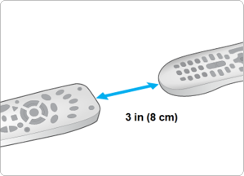
Harmony 300/350

Harmony Touch or Ultimate
Harmony 200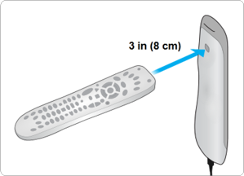
Harmony 200

Harmony Hub


- The instructions on MyHarmony desktop software will notify you once the command is recognized.
- Click Finish.
- Once you have added the new command you may then assign it to a button on your Harmony remote.
- Learn more about customizing physical buttons on your remote.
- Learn more about customizing buttons on your remote screen.
- Learn more about customizing buttons in the Harmony App.
- Remember to sync your remote after making any changes.
Using the Harmony app
- Launch the Harmony app and sign into your account.
- Select your Harmony remote, followed by DEVICES and select your device.
- Select ADD / FIX COMMAND and select the command you'd like to fix.
- Point your original remote at your Harmony remote's IR sensor as shown in the app.
- Harmony 200, Ultimate, Ultimate One, and Touch IR sensors are located on the back of the remote.
- Harmony 300, 350, 600, 650, 665, and 700 IR sensors are located on the top of the remote.
- On your device's original remote, press the button you want to teach Harmony for about two seconds.
Harmony 600/650/700
Harmony 300/350
Harmony 300/350

Harmony Touch or Ultimate
Harmony 200
Harmony 200

- The Harmony desktop app will notify you when the command is recognized.
- Finally, select the sync icon in the upper right corner of the settings menu, followed by SYNC NOW.
Using the Harmony app
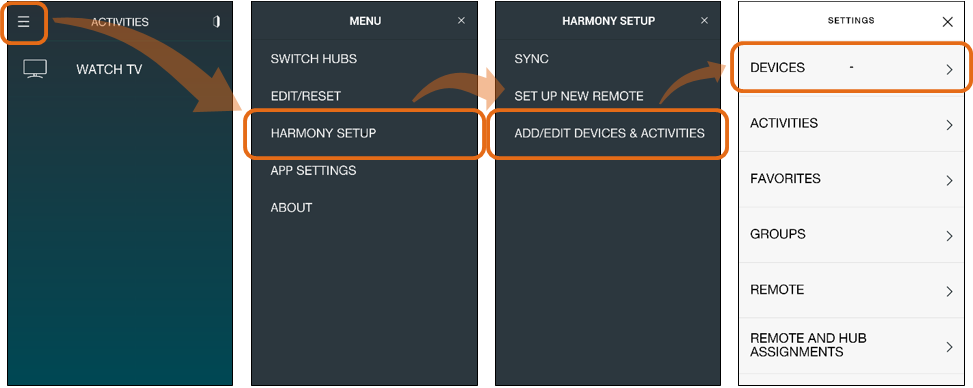
- Select the MENU icon from within the Harmony app.
- Select HARMONY SETUP > ADD/EDIT DEVICES & ACTIVITIES > DEVICES.
- Select the device you wish to modify, and select ADD/FIX COMMAND.
- Select the command from the list and press > in the top right to continue.
- Point the tip of your device's original remote control at the IR input sensor on your hub as instructed by the on-screen photo. The remote should be approximately 3 inches (8 cm) apart from the hub.
- Harmony App will notify you once the command is recognized.
- Press > in the top right when done.

Using the Harmony Express app
You can teach your Harmony Express new commands by following the instructions below. If you're trying to replace a device, see:
Replacing a device in your account
- Launch the Harmony Express app and tap Device Settings.
- Tap the device you would like to modify, followed by Teach Command.
- Tap the pencil icon next to the command you would like to teach and follow the on-screen prompts.

