How to create a Harmony Activity
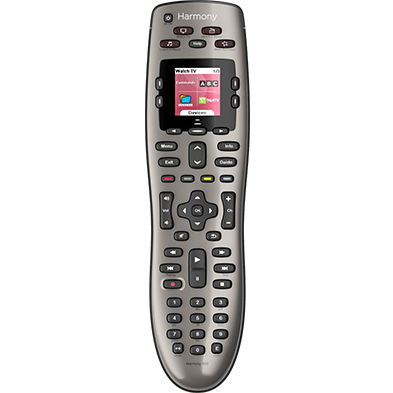
When setting up a new Harmony remote, Harmony will either automatically create Activities or guide you through the process of creating them yourself. If you're adding a device or need something different than what's automatically created, then you'll need to manually create an Activity.
Creating an Activity
Let's take a look at how to create your Activity, in the examples provided below, we'll walk through the process of creating a Watch TV Activity.
If you're looking for information about how Harmony Activities function differently than your original remote control, this video may be helpful. For more information, please see: Understanding Harmony Activities

We recommend downloading this device worksheet to help capture your own device information. For this example we'll use:

Steps to create your Activity
- Sign in using the MyHarmony desktop software and select your remote from the gallery.
- Select the Activities tab on the left and click Add Activity.
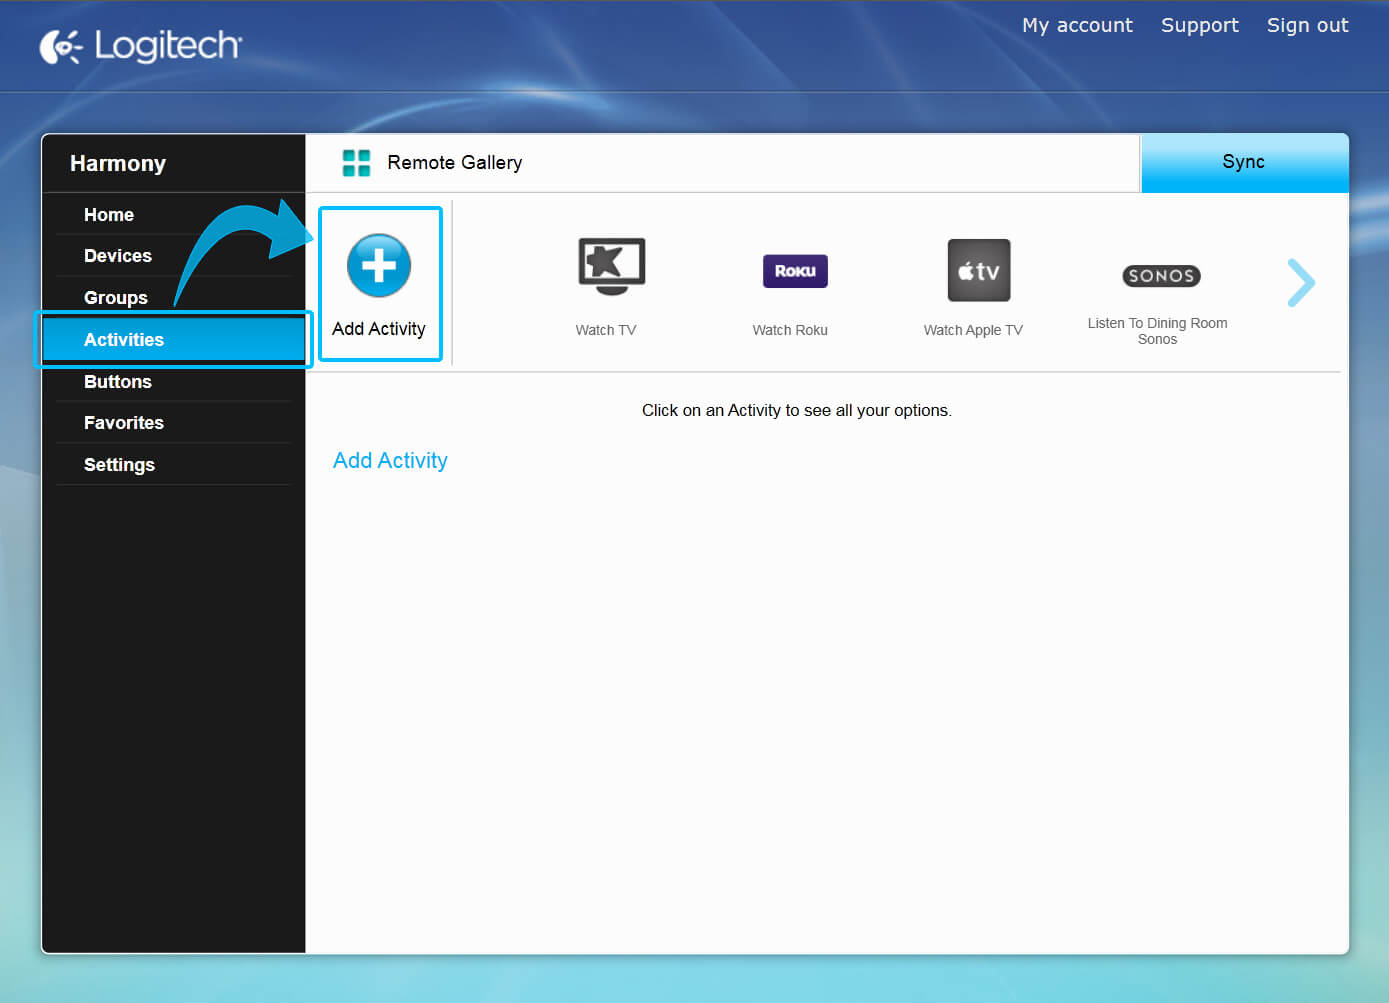
To get the best default button assignments, we recommend basing your Activities off of one of the default Activity types; for example, a Watch Netflix Activity is similar to Watch a Movie or Watch TV. The Custom Activity type should only be used for unique situations, such as controlling your fireplace.
- For our example, select the Watch TV Activity type.
- Enter a unique name for your Activity and optionally upload an icon that will display on your remote.
(compatible remotes only) - Select only the devices that are needed as part this Activity.
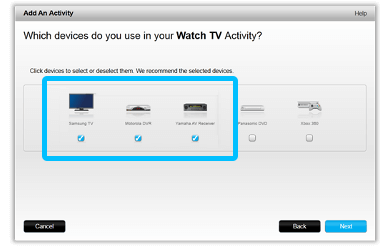
- Select the device that's used to change channels. In our example it is the cable/satellite box.
- Select the device that's used to control the volume. In our example it is the AV receiver.

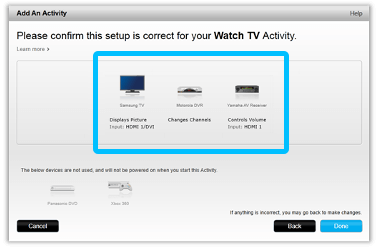
- Referring back to your worksheet, select the input that your TV must be set to when watching TV.
- Similarly, select the input that your AV receiver must be set to. In our example, this is HDMI 1.

- You are now complete. Remember to sync your remote after making any changes.
- From the Harmony app, select MENU then Harmony Setup.
- Select Add/Edit Devices & Activities, then ACTIVITIES.
Harmony will suggest different types of Activities based on the devices you have added to your account. To get the best default button assignments, we recommend basing your Activities off of one of the default Activity types; for example, a Watch Netflix Activity is similar to Watch a Movie or Watch TV.
- Click ADD ACTIVITY and select the WATCH TV Activity, select > to continue.
- Select only the devices that are needed as part this Activity.
- Use the ON button to power on any devices that are off and select MY DEVICES ARE ON when complete.
- Select your TV icon and choose the correct inputs for both your TV and Receiver. In our example, this is HDMI 1/DVI.
Harmony will immediately send the inputs as you select them. Once both inputs are selected you will be asked if you are able to see and hear content from your new Activity. Select YES if the Activity is working properly or NO to adjust settings. Once complete you can choose to do a final test of the Activity or skip this step.
- Launch the Harmony app and sign into your account.
- Select your Harmony remote, followed by ACTIVITIES.
- Select ADD ACTIVITY and choose the type of Activity you would like to create.
- Follow the on-screen prompts to finish configuring your Activity.
- Finally, select the sync icon in the upper right corner of the settings menu, followed by SYNC NOW.
Select your remote
We need to know which type of remote you have in order to provide you the correct instructions. Please select from one of the options below in order to get started.
Incompatible Remote
Instructions on this page are not relevant for the Harmony remote you've selected.
← GO BACK

 Dutch
Dutch English
 French
 German
 Italian
 Spanish