Harmony Experience with SmartThings
It's compatible with Harmony hub‑based products

Setup
Add SmartThings to your Harmony setup
- Launch the Harmony app and connect to your Harmony hub.
- Select MENU, then Harmony Setup > Add/Edit Devices & Activities > Devices.
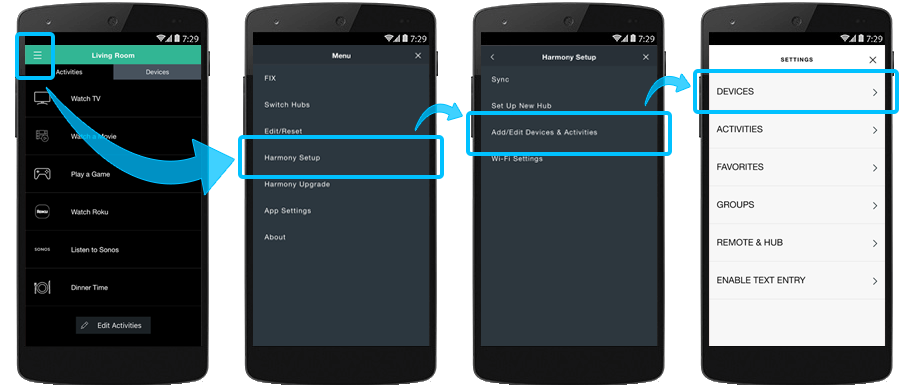
- Select the ADD DEVICE at the bottom, followed by HOME CONTROL > SMARTTHINGS.

- To complete the process, you'll be prompted to sign into your SmartThings account.
Add SmartThings using the MyHarmony desktop software
- Launch the MyHarmony desktop software and sign into your account.
- Select your Harmony product from the Remote Gallery.
- Select the Devices tab, then Add device.
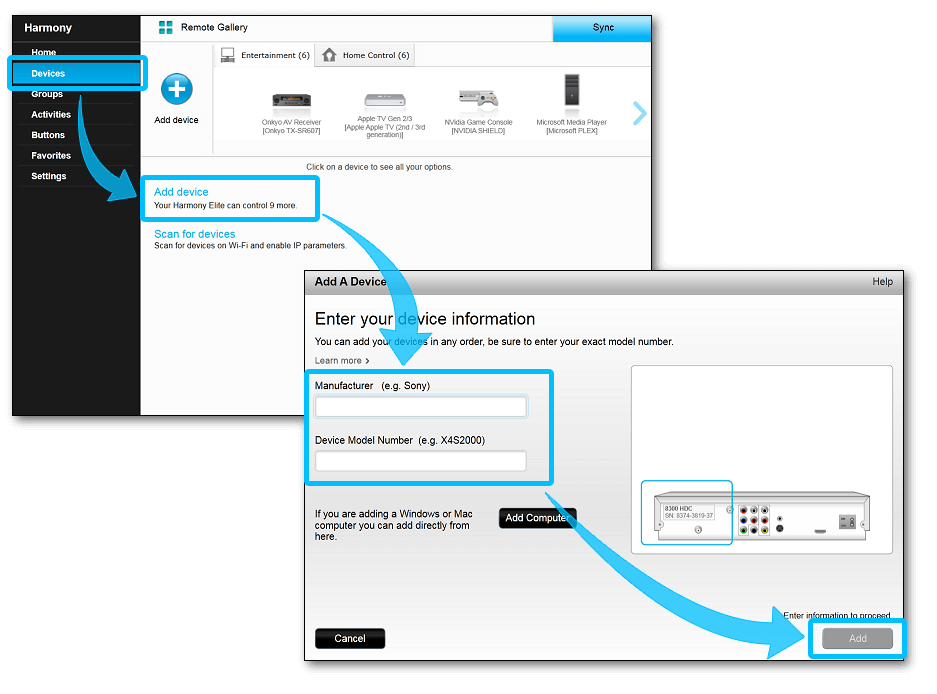
- Enter manufacturer SmartThings followed by your SmartThings model number.
- Finally, select Add to complete the process.
If your SmartThings Hub is not found, ensure that it's connected to the same home Wi‑Fi network as your Harmony hub.
Control
| Harmony control | Harmony app | Touchscreen remote |
|---|---|---|
| Quick on/off |  |
 |
| Adjust brightness |  |
 |
| Organize bulbs |  |
Quick on/off and brightness
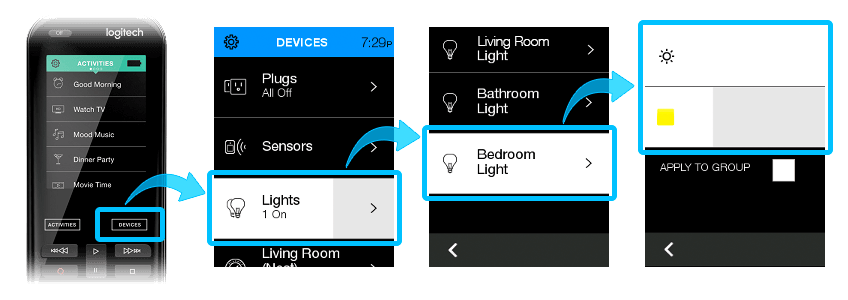
Using your Harmony touchscreen remote, select the DEVICES button located just under the touchscreen display, this will allow you to view your devices. Selecting the icon next to the Lights group will toggle all lights on or off, while pressing > to the right of the group name will reveal each of your individual bulbs. Select > to the right of one of your bulbs, then swipe left or right to control brightness.
Quick on/off and brightness
Using the Harmony app, navigate to the Devices tab. Selecting the icon next to the Lights group will toggle all lights on or off, and pressing the down arrow will reveal each of your individual bulbs. Long press on the name of one of your bulbs then swipe left or right to control brightness.
Changing the color of light bulbs
Select the > arrow next to a bulb to view and change its color values. If this bulb only supports brightness control, you'll see a brightness slider instead.
Organize your bulbs
You may organize your light bulbs into groups such as Living Room or Hallway. From the Devices tab, scroll to the bottom and select Edit > Group. You'll be prompted to provide a group name and select the light bulbs you'd like to include. Once configured, you may select the group bulb icon to power everything on/off, long press and swipe left/right to control brightness, or expand the group to control bulbs individually. You cannot change the color for a group of bulbs. If you have a touchscreen remote, the same groups will appear there as well.
Add Lights, Plugs, or Locks to your Harmony remote's Home Control buttons.
- Navigate to MENU, then select Harmony Setup > Add/Edit Devices > REMOTE & HUB.
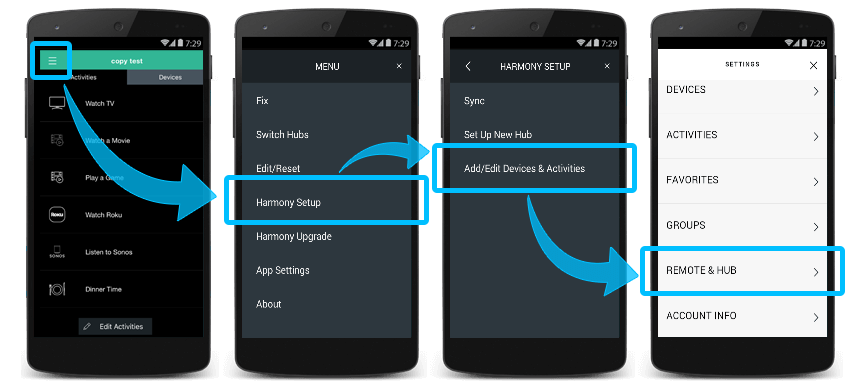
- Select BUTTON CUSTOMIZATION and then CUSTOMIZE BUTTONS.
- Select HOME CONTROL BUTTONS.
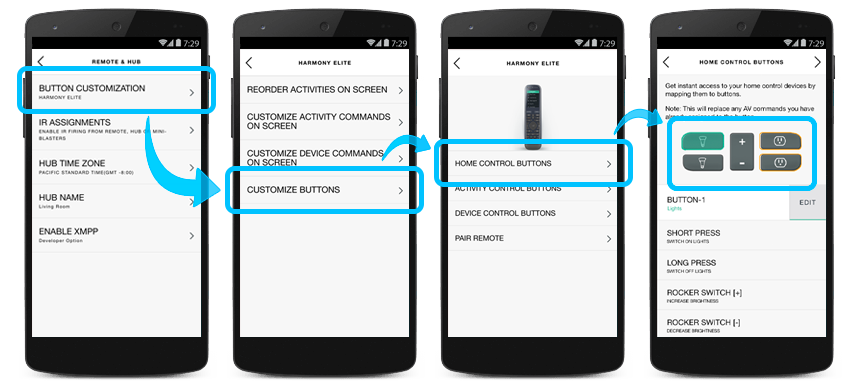
- Select the Home Control button you wish to assign to your light, plugs, lock or lights, plugs, or locks group.
- Tap > on the top right to confirm the changes.
For more information on Groups see How to create Home Control Groups
FAQS
Harmony displays an error and can no longer control SmartThings
If you've factory reset your Harmony hub or changed your August password then you must re-login from Harmony.
Using the Harmony app
- Select MENU, then Harmony Setup > Add/Edit Devices & ACTIVITIES.
- Select DEVICES and then select SmartThings.
- Select RE-LOGIN and re-enter your username and password.
- Select the SmartThings Bridge that was linked with your Harmony Remote.
- Tap Authorize.
- Harmony will re-link with your SmartThings Bridge.
SUPPORTED MODEL NUMBERS
- IM6001-V3
- STH-ETH-200
- STH-ETH-250
- ET-WV525
Setup
SmartThings must be added by enabling its skill on the Alexa app. Once enabled, you can press the OK button on your Harmony Express remote to send SmartThings voice commands.
Integration details
Harmony Express remotes
Harmony connects with your SmartThings through its Alexa skill.
Integration details
Hub‑based remotes
Harmony connects with your Samsung SmartThings Bridge using an internet connection. Please ensure your Samsung SmartThings Bridge is connected to the internet.
Cloud Access
Depending on your devices and integrations, Harmony remote may need Cloud Access in order to function properly. Please see the Harmony Cloud Access article for more information and instructions on how to turn it on.
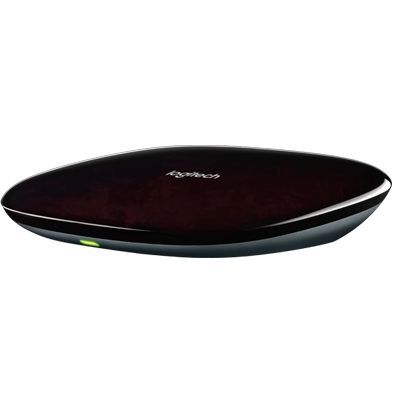
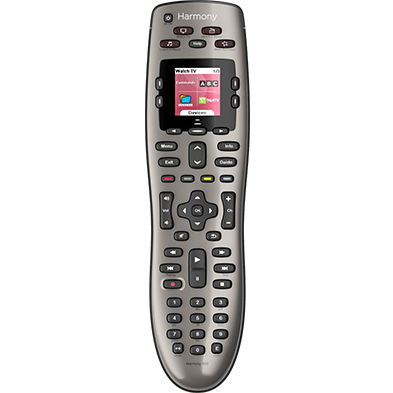
Select your remote
We need to know which type of remote you have in order to provide you the correct instructions. Please select from one of the options below in order to get started.
Incompatible Remote
Instructions on this page are not relevant for the Harmony remote you've selected.
← GO BACK

 Dutch
Dutch English
 French
 German
 Italian
 Spanish