Adding a device that's not found in the Harmony database
The Harmony database is stored with over 225,000 devices and is growing each day. However, it may be possible that one of your devices is not yet known. If you have confirmed that the manufacturer and model number you entered is correct, then you may still teach this device to Harmony so that you can control it.
Using the Harmony Express app
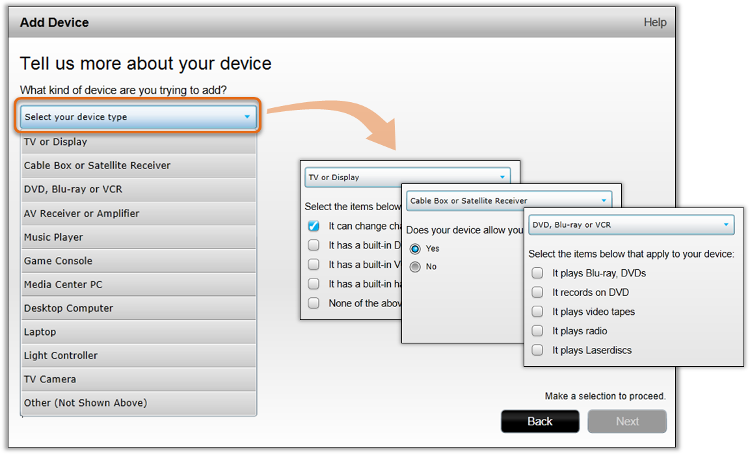
After trying to manually enter your device's manufacturer and model number, if your device is not found in the Harmony database, you will be prompted to tell us more about the device.
- Select MY DEVICE IS CORRECT.
- Select the features that apply to the device you are adding and tap CONTINUE.
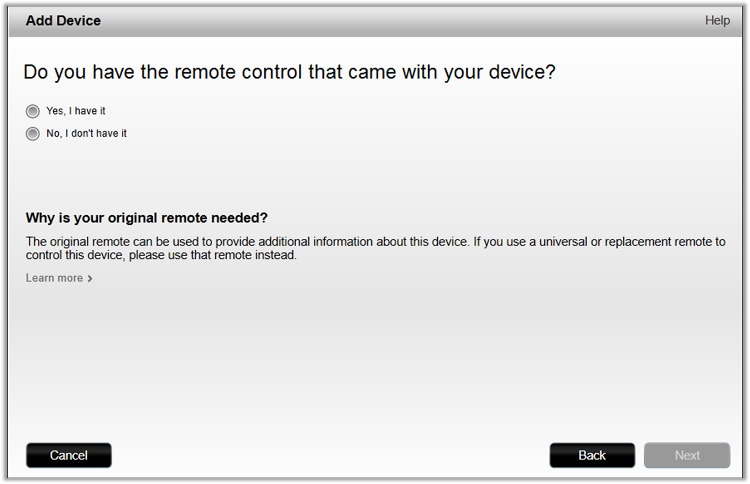
- For Harmony to learn IR commands for your device, you need to use its original remote or another remote you've set up to control it.
- Select YES and follow the on-screen instructions.
Using the Harmony app
- Launch the Harmony mobile app and connect to your Harmony hub.
- Select MENU, then Harmony Setup > Add/Edit Devices & Activities > DEVICES.
- Select ADD DEVICE at the bottom of the screen.
- Select the type of device you're trying to add and enter the manufacturer and model number.
- You will be prompted to tell us more about your device.
- Press MY DEVICE IS CORRECT.
- After checking to make sure all information has been entered correctly, press CONTINUE.
- Select the category and characteristics that best describe this devices capabilities so Harmony understands how to best control this device, then press > to continue.
- Select the features that apply to the device you are adding, then press > to continue.
- For Harmony to learn the IR commands for this device, you must use the original remote that came with this device or another remote that is able to control it. Select YES to continue.
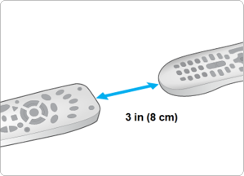
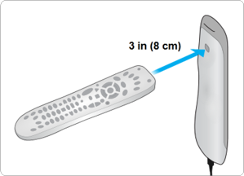
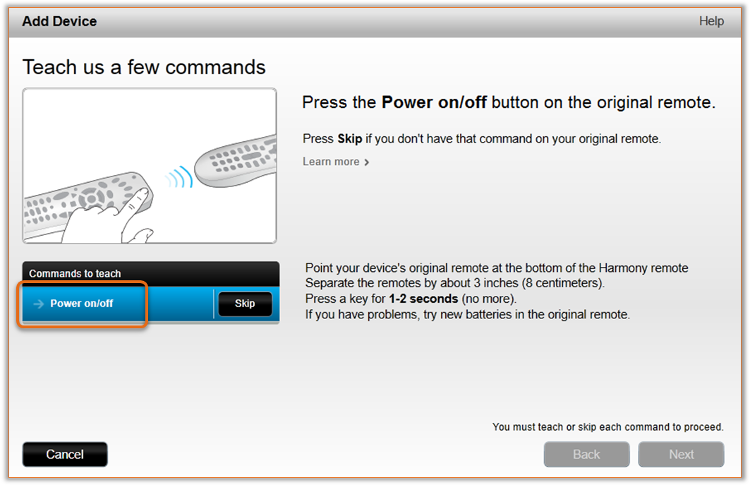
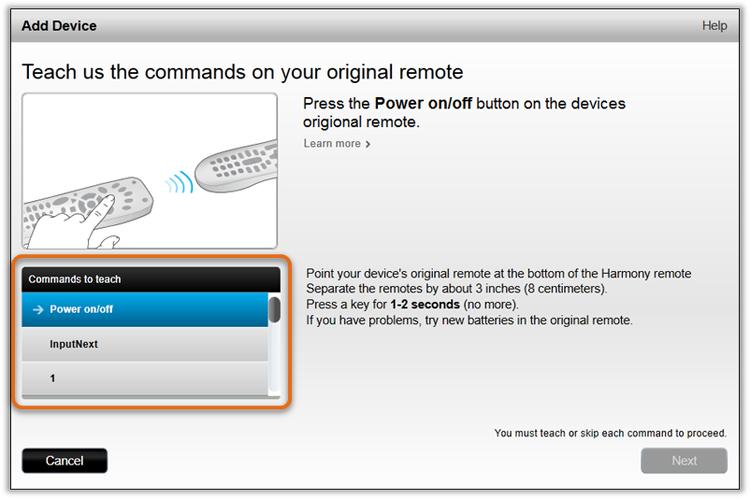
- Point the tip of your device’s original remote control at the front (top area of the Harmony Hub) as instructed by the screen. The remote should be approximately 3 inches (8 cm) away from the Hub.
- You will be prompted to teach several commands from your original remote control. Hold the button for 1 to 2 seconds.
As you are teaching the Harmony database about your device, it's important to answer the questions carefully to ensure it will be properly controlled once complete.
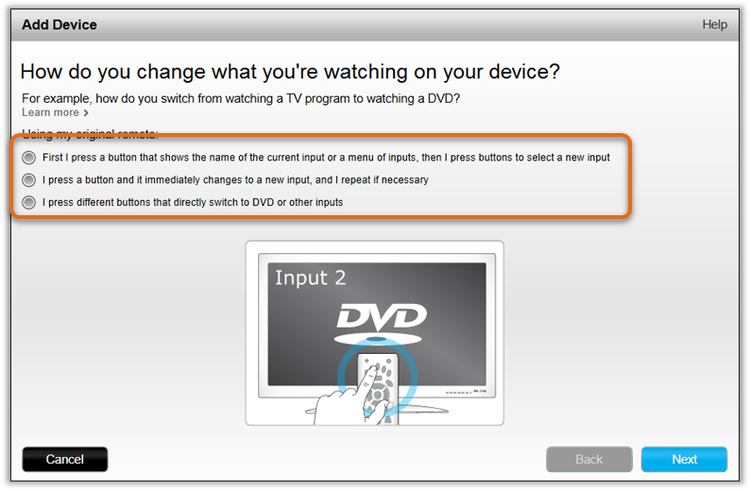
- Select the best description for how your device changes between its inputs.
- This support article may help to further explain each of the options: Understanding different input changing methods.
- You may be asked to learn additional commands necessary to change your devices inputs.
- Once the workflow is complete, your device will be added to your account, but will not yet be associated with an Activity. Click YES when prompted to create an Activity.
Using the desktop software
- Follow steps 1 through 4 in the how to add a device to your Harmony remote support article. If your device is not found in the Harmony database, you will be prompted to tell us more about the device.
- Select the category and characteristics that best describe this devices capabilities so Harmony understands how to best control this device.
- In order for Harmony to learn the IR commands for this device, you'll have to teach those signals using the original remote that came with this device, or using another remote that is able to control it. Select Yes to continue.
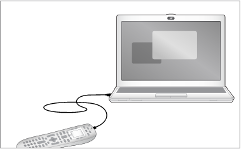
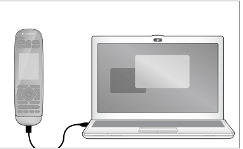
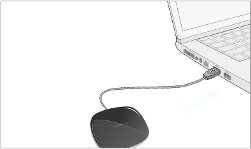
- Using the USB cable that came with your Harmony remote, connect it to your computer.
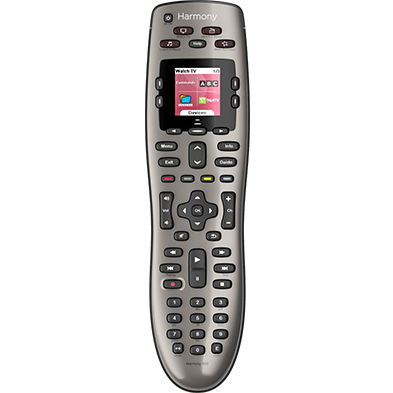
- Harmony 600/650/700 remotes connect from the top of the remote.
- Harmony Ultimate, Ultimate One & Touch remotes connect from the bottom. Do not use the charging cradle.
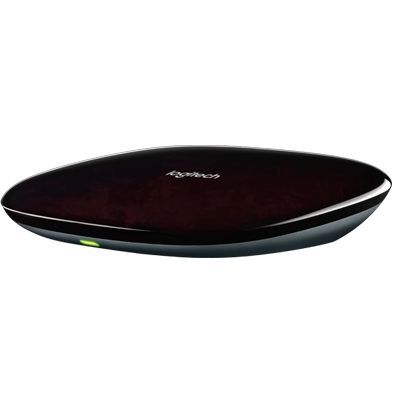
- Harmony Hubs connect from the back.
- View additional support information if your remote or Hub is not being detected.
Harmony 200/300/350
or Touch
- Point the tip of your devices original remote control at the IR input sensor on your Harmony remote or hub as instructed by the screen animation. The remotes should be approximately 3 inches (8 cm) apart.
- The Harmony 600/650/700 IR input sensor is on the top of the Harmony remote.
- The Harmony Ultimate, Ultimate One & Touch IR input sensor is on the back.
- The Harmony Hub IR input sensor is on the front/ top.
- You will be prompted to teach several commands from your original remote control. Hold the button for 1 to 2 seconds.
Harmony 300/350
Touch or 200

The below steps are for guidance purposes. The questions you see on MyHarmony desktop software may differ slightly depending on the device you are adding, or may not be asked at all.
As you are teaching the Harmony database about your device it is important to answer the questions carefully to ensure it will be properly controlled once complete.
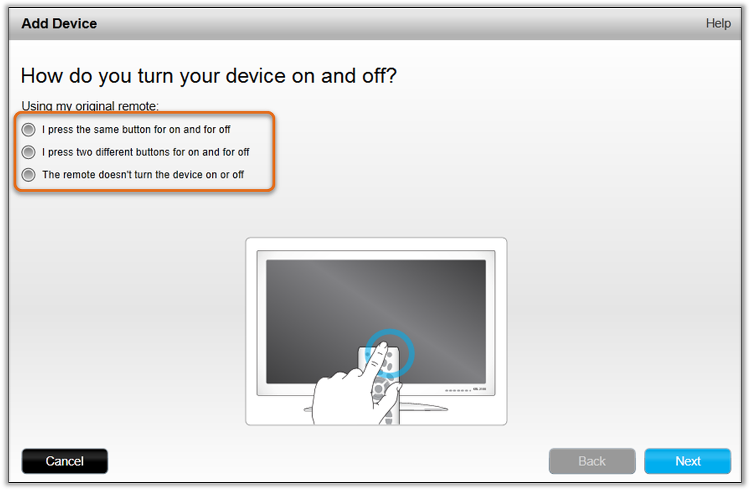
- Select the best description for how your device turns on and off.
Depending on your answer, there may be a follow-up question asking for additional information about which commands are used.
- Select the best description for how your device changes between its inputs.
This support article may help to further explain each of the options: Understanding different input changing methods.
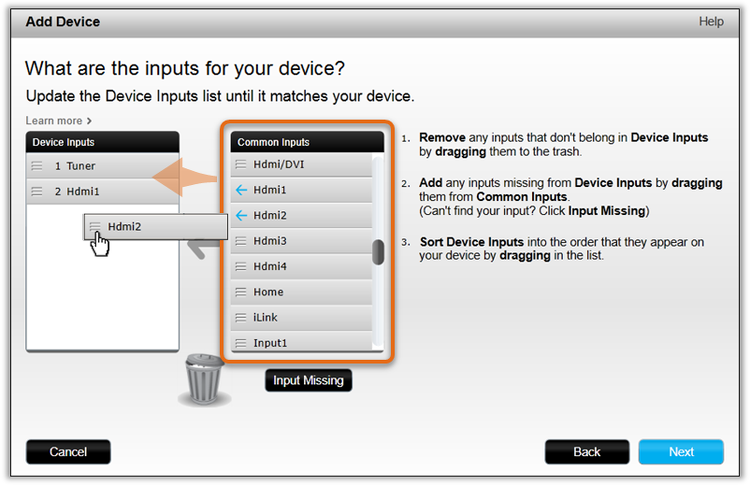
- Create a list of inputs in the left, Device Inputs column by dragging from the list of command options in the right, Common Inputs column. The left column should match the inputs, and the order of inputs you see on your device.
- Harmony will analyze the IR commands you taught in step 6 to see if it is similar to other devices and commands in the database. If a match is found, your device will be added. If a match is not found, you will be asked to teach an additional set of IR commands from your original remote control.
- Once the workflow is complete, your device will be added to your account. Remember to sync your remote after making any changes.
Although the device is now added to your Harmony account, it is not yet associated with a Harmony Activity. The Harmony app will guide you through creating an Activity. View the how to create a Harmony Activity support article for more information.
Using the desktop software
- Launch the Harmony app and sign into your account.
- Select your Harmony remote, followed by DEVICES > ADD DEVICE.
- Enter the manufacturer and model number for the device you're adding.
- Sync your remote by selecting the sync icon in the upper right corner of the settings menu.
- If your device is not found in the Harmony database, you will be prompted to tell us more about your device.
- Ensure your device information has been entered correctly, then select MY DEVICE IS CORRECT.
- Ensure your device information has been entered correctly, then select CONTINUE.
- Select the options that best describe your device, and follow the on-screen guidance.
Select your remote
We need to know which type of remote you have in order to provide you the correct instructions. Please select from one of the options below in order to get started.
Incompatible Remote
Instructions on this page are not relevant for the Harmony remote you've selected.
← GO BACK
 Dutch
Dutch English
 French
 German
 Italian
 Spanish