Syncing changes to Harmony
When you make a change to your Harmony settings, those changes need to be synced with your Harmony remote.
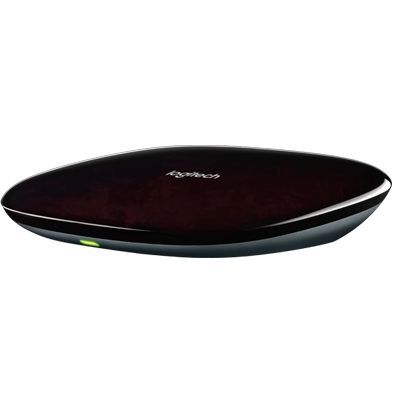
Using Wi‑Fi
Harmony hub‑based products may sync their settings over Wi‑Fi. They also allow device and Activity configurations to be made from the remote and/or Harmony mobile app. Changes made on MyHarmony desktop software must be manually synced to your remote or hub; however, changes made directly on the remote or Harmony mobile app will automatically sync to the Harmony cloud.
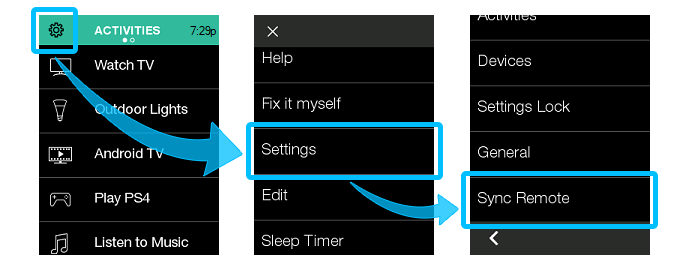
- To sync changes using your remote, navigate to Menu > Settings > Sync Remote.
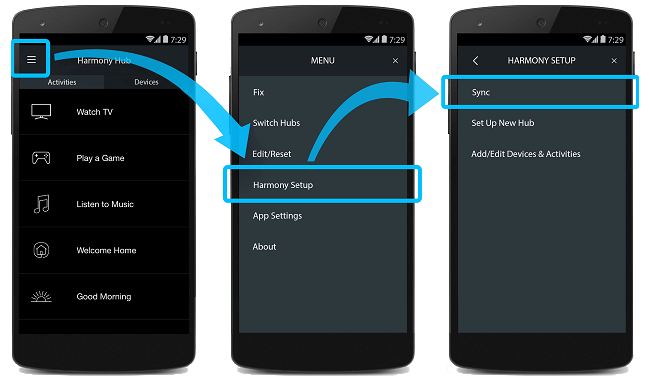
- To sync changes using the Harmony mobile app, navigate to Menu ( or ) > Harmony Setup > Sync.
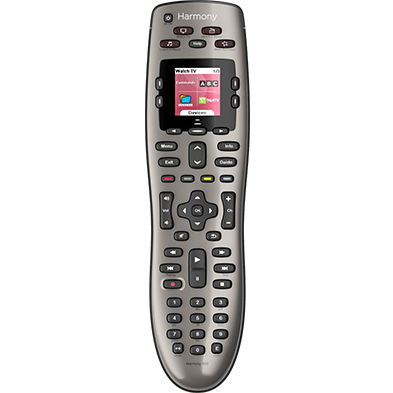
From the Harmony remote
From the Harmony mobile app
Harmony periodically releases firmware updates and will notify you on the Harmony remote and the Harmony app when one is available for your device.
Firmware updates will be delivered over Wi‑Fi for products with a hub.
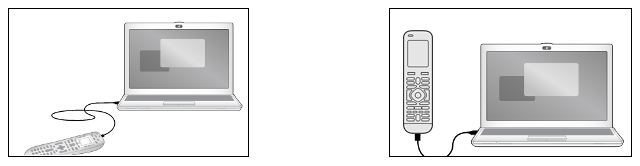
With Harmony Ultimate and Ultimate Home your remote may prompt you to connect your remote to your computer using USB.
Troubleshooting
If your Harmony remote fails to sync, we recommend following the, how to sync over USB, instructions above.
Using a USB cable
Harmony IR remotes, which don't use a hub or the Harmony mobile app, synchronize their settings using a USB cable that connects from your remote to your computer. Any time a change is made using the MyHarmony desktop software, you must sync those changes to your remote. Harmony hub‑based remotes may also sync over USB to receive firmware updates or if syncing over Wi‑Fi fails.
- Sign into the MyHarmony desktop software and select your remote from the Remote Gallery.
- From the Home tab, click Sync in the upper right-hand corner.
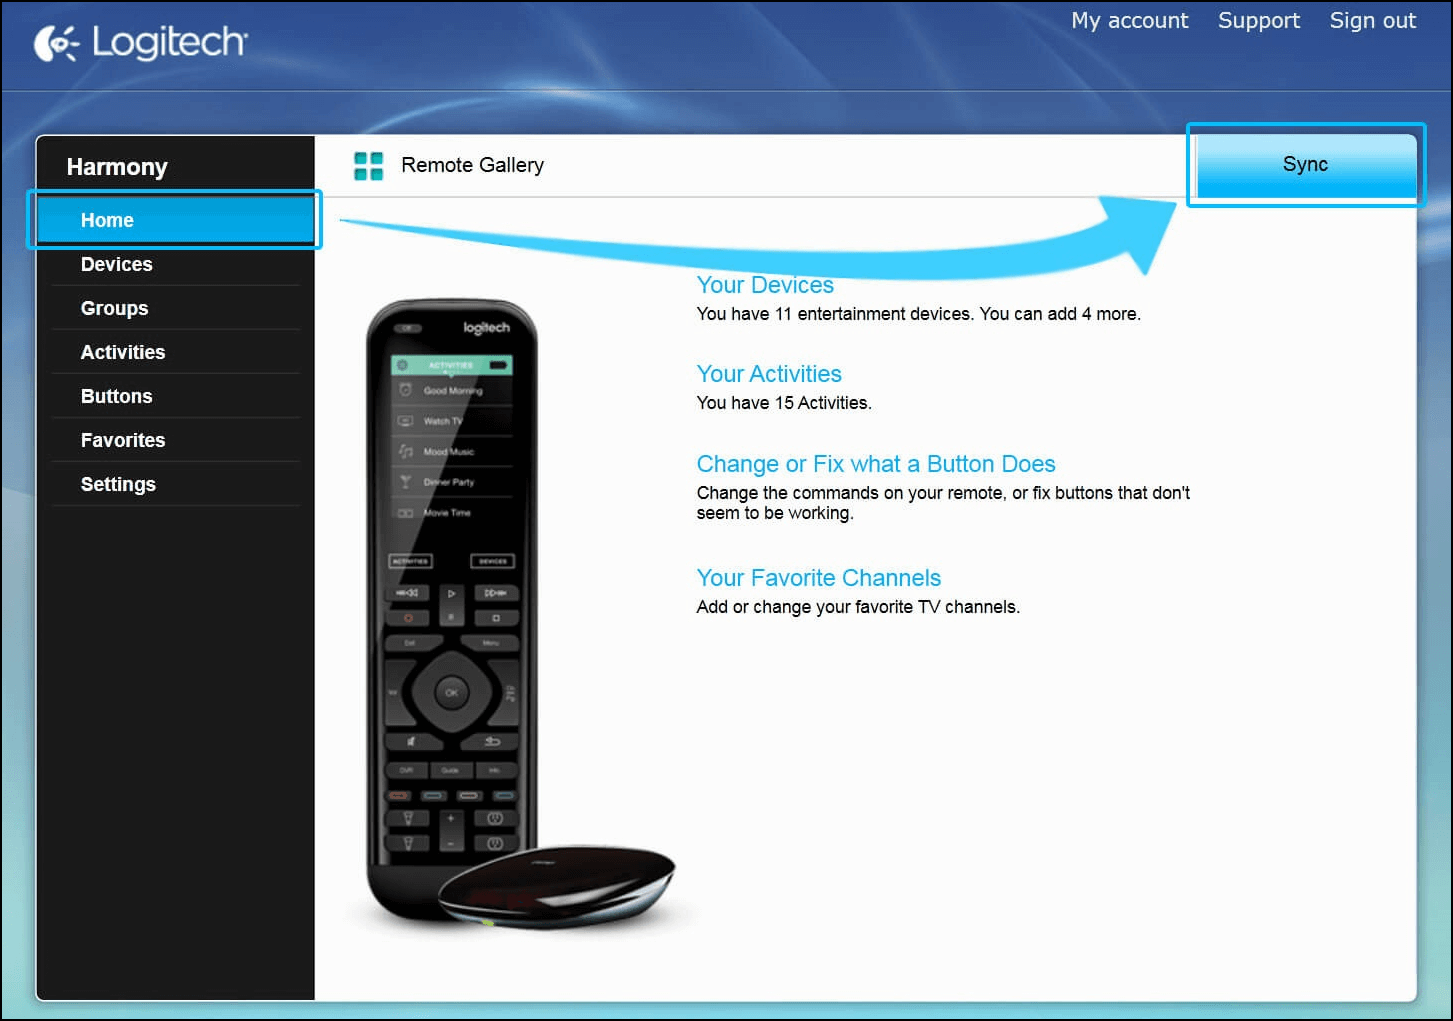
- You will be prompted to connect your Harmony remote to your computer using the supplied USB cable.
(This will check for firmware updates then sync changes made to your remote)
- The Sync button is grey when there are no changes to sync.
- The Sync button is yellow when there are changes to sync, but the remote is not connected to your computer.
- The Sync button is blue when there are changes to sync and the remote is connected.
Troubleshooting
If your Harmony remote fails to sync, try the following:
- Exit the desktop software, then re-launch it and try to sync again.
- Reboot your remote by pressing and holding the Off button until the LCD screen turns off and then back on, then try to sync again. (Only for Pro, Elite, 950, Ultimate Home, Ultimate, Ultimate One and Touch remotes)
- Try logging in to your account and syncing using a different computer.
- Try resetting your remote to factory defaults and then syncing again.
Syncing changes
- Launch the Harmony app and sign into your account.
- Select your Harmony remote, then select the sync icon in the upper right corner.
- You may be asked to connect your remote via USB to your computer.
- Select your remote language, followed by SYNC NOW.
Syncing changes
Whenever you make changes to your configuration using the Harmony Express app, your changes will automatically sync to your remote. There is no need to manually sync your changes with Harmony Express remotes.
Select your remote
We need to know which type of remote you have in order to provide you the correct instructions. Please select from one of the options below in order to get started.
Incompatible Remote
Instructions on this page are not relevant for the Harmony remote you've selected.
← GO BACK
 Dutch
Dutch English
 French
 German
 Italian
 Spanish